Pages

Showing posts with label American Civil War 10mm. Show all posts

Friday, April 23, 2021

The Battle Of Iuka September 19, 1862 Mississippi (Part 1)

 Game Details:

Rules: Piquet Field of Battle, 3rd Edition

Scenario: "Iuka" from the book "Rebel Yell, Yankee Hurrah!" by Potomac Publications

Game Scale: Regiment -  1"=40yds (apx.)

Figure Scale: 10mm

Table Size: 5'X5'

Table Overview:
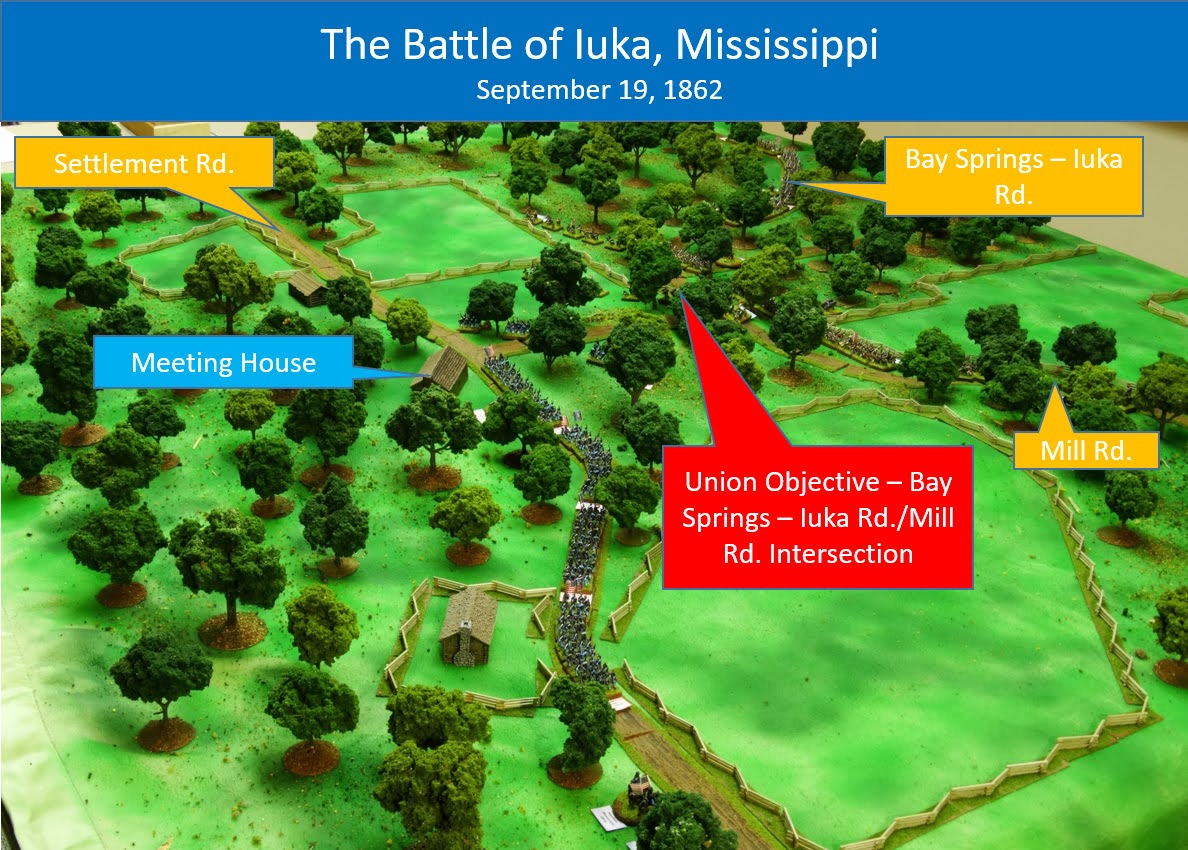

Game Length:  4 p.m. to 6:45 p.m.

Victory Conditions: The Federals Must Possess the Bay Springs-Iuka/ Mill Road intersection at the end of the game. The Confederates must hold the intersection. Anything less is a draw.

Initial Setup:

test

Initial setup from the Federals Side of the table.


Initial setup from the Confederate side of the table.

Brig. General Louis Hebert oversees the placement of Clarks artillery battery on the Bay Springs-Iuka/Settlement Road Intersection. This Intersection is the Union's objective for the game. 


Turn 1 (4:00 - 5:00)

4:00 - 4:20 | On the first Union movement card, division commander General Charles Hamilton is forced to take personal control of Sanborn's Brigade after Col. Sanborn rolls a one for movement. General Hamilton rolls even and gets three movement segments. Sanborn's brigade is rushed down the Settlement Road and then formed into line of battle.


4:00 - 4:20 | Sullivan's Brigade is the second Union brigade to arrive on the table. They advance north in column of march along the Settlement Road. 


4:00 - 4:20 | Col. Jerimiah Sullivan oversees his brigade as they move on to the table.


4:20 – 4:40 | The Confederate Command uses its first two move cards to form its two brigades into a defensive line. Clarks Battery is the center of this line.


4:20-4:40 | On the Confederate left flank, the St. Louis Battery unlimbers on a ridge that overlooks the Bay Springs-Iuka Road. On the next Artillery fire power card, they open fire on Sullivan’s Brigade as they march up the road. The bombardment scores a hit on one of the regiments causing one unit integrity loss and disorder.


4:20 - 4:40 | Before the bombardment from the St. louis battery can cause anymore damage, General Sullivan rally's his disordered regiment and deploys his brigade into line of battle. 


4:20 - 4:40 | On the Union Left, Sanborn's brigade opens fire on the Confederate skirmishers. The fire forces one of the units to fall back disordered with 1 UI loss.

4:40 - 5:00 | The 17th Arkansas moves into position on the Confederate Left flank next to the St. Louis Battery 


4:40 - 5:00 | On the next Union movement card, Sanborn’s Brigade begins its attack on the Confederate line.


4:40 - 5:00 | The Union’s attack looking north.


4:40 - 5:00 | After the Federals complete their movement both sides choose to preform opportunity fire. The Confederates fire first. Their fire causes one Union regiment to rout. On the Bay Springs-Iuka/Settlement Rd intersection Clarks Battery fires into the advancing federals at close range. The fire is ineffective!


4:40 - 5:00 | The Union Brigade then returns fire. The 26th Missouri takes aim and fires at Clarks Battery. They score three hits and destroy the battery! The union fire also causes the 40th Mississippi to fall back disordered with one unit integrity loss. The Bay Springs-Iuka/Settlement Rd intersection is now undefended.  


5:00 [End of turn 1] Turn one ends after the Confederates completes their sequence deck. The Union side had three very critical cards remaining in their deck. They were, move, infantry fire and Melee. The loss of three cards could be critical to the outcome of the battle.

Part 2 Coming Soon


Sunday, July 13, 2014

New Photo Battle Report Posted- The Battle of Big Bethel


Hello all, I have decided to re-boot my ACW game series. My plan is to play through all the scenarios in the Regimental Fire and Fury volume 1 scenarios book. I will also add in the scenarios from the rule book and whatever else I find. To play these games, I will use the Rank and File rule set.

First up is the 1861 battle of Big Bethel.  Here’s the link to the battle report:


Thanks for looking
Bryan

Saturday, January 18, 2014

Painted 10mm American Civil War Limbers from Pendraken


Today, I have some photos of my freshly painted artillery limbers. These figures are from Pendrakens new Civil War range. This batch consists of eight Union and eight Confederate limbers. For mostly esthetic reasons, I decided to make the switch from having two horses per limber to four horses. I’m very satisfied with this change, so going forward I will probably switch all my limbers over to four horses. The only downside to this is that I will need to paint twice as many horses. At times, this was a little painful when painting this last batch of limbers.
 

Link to Pendraken Miniatures - LINK

Wednesday, January 15, 2014

New 10mm American Civil War figures from Cracker Line Miniatures


My friend Bill, who is the owner of Cracker Line Miniatures, has just sent me some photos of his newest additions to his growing 10mm American Civil War range. These new additions include a galloping limber team, several new mounted commanders, and a new artillery crew. What makes these figures extra special is that they were designed to resemble the troops that fought in the western theater. Here are the photos.


In addition to the figures pictured above, Cracker Line plans to release cavalry in the first quarter of 2014. For more information on Cracker Line Miniatures please visit their web page; Link

Friday, June 14, 2013

Painted: Buildings in Turmoil, The Widow Thompson House

Today, I have a few photos of my newly painted 10mm Thompson House from Buildings in Turmoil. During the Battle of Gettysburg General Robert E. Lee used the Thompson House as his headquarters.


Link to Buildings in Turmoil: Link


Wednesday, May 22, 2013

Game Photos: The Bloody Cornfield, Antietam 1862

Game Details:


Rules: A modified version of Rally Round the Flag by Scott Monsour

Scenario: "Antietam: Hooker" By George Anderson (Miniature Wargames Magazine, December 1990) Note: This scenario covers Hookers opening attack on the Cornfield. The scenario ends before reserves on both sides are brought into the battle. Hood for the Confederates and Mansfield for the Union.

Ground Scale: 1”= 30yds (apx.)

Table Size: 6’ X 5’

Table Overview:


Victory Conditions: The Union must inflict 60% losses on the Rebels before the end of the game. The game length is eight fifteen minute turns.

Initial setup:


Turn 1


Turn 2


Turn 3


Turn 4


Turn 5


Turn 6


Turn 7


Turn 8


About This Game:

I ran this game three times in the fall of 2012, including at Fall-In. The Union players won two of the three games. The game pictured above was a near Union victory. Shortly after putting this game together, Rick Hasenauer released a Cornfield scenario for his Regimental Fire and Fury Scenarios book. At some point, I’m hoping to revisit this battle and give Rick’s scenario a try.

Thanks for looking

Bryan