Showing posts with label 10mm Terrain. Show all posts
Friday, June 14, 2013
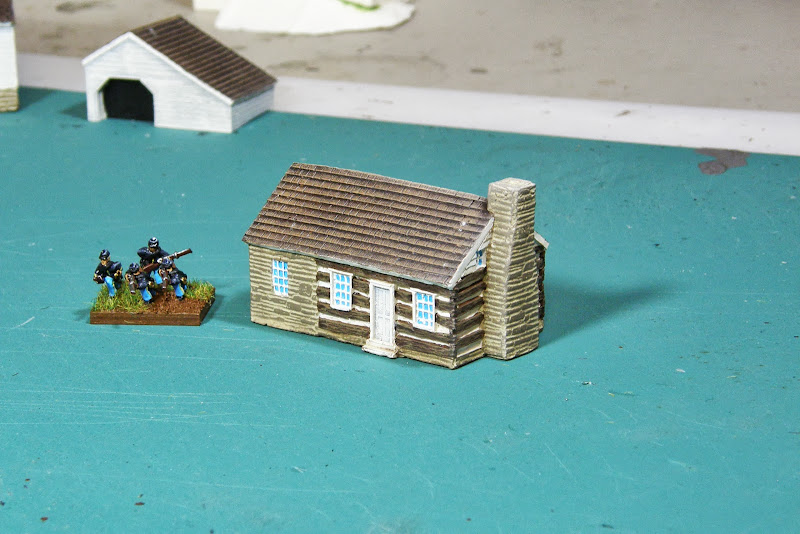
Painted: Buildings in Turmoil, The Widow Thompson House
Today, I have a few photos of my newly painted 10mm Thompson House from Buildings in Turmoil. During the Battle of Gettysburg General Robert E. Lee used the Thompson House as his headquarters.


Friday, June 7, 2013
Painted: Buildings in Turmoil, McPherson Farm
I have begun work on my Gettysburg games. The first two scenarios will cover the morning and afternoon fight for McPherson Ridge, Seminary Ridge and Oak Ridge. In preparation for these games, my first priority after getting my dismounted Union cavalry painted was to start painting my 10mm Gettysburg buildings from Buildings in Turmoil. At first, I was a little intimidated by all the fine detail that these models have. But in the end, I ended up painting them just like all my other 10mm buildings and I think they turned out great. Below are a few photos of my completed McPherson Farm. Next, I will be working on the Thompson house, McLean Farm, and finally the Seminary. I will post photos as I complete them.


McPherson House


McPherson Barn


McPherson Carriage House
McPherson House
McPherson Barn
McPherson Carriage House
Link to Buildings in Turmoil: Link
Tuesday, March 19, 2013
Quick and Easy 10mm/15mm Tombstones
I needed some tombstones for my upcoming refight of the Battle of Salem Church, so I decided to try a method that Chris Palmer posted on his blog that uses wooden craft sticks to model tombstones. Basically, all you do is cut off the ends of the craft sticks and glue them to a base. You then paint them and flock the base. The result is a great looking cemetery. For more details on building these tombstones please see Chris’s blog: Link
Friday, October 12, 2012
The Dunker Church, 10mm building by Time Cast
Work continues on my upcoming Antietam game. Today, I just finished up painting the Dunker Church. This model was produced by Time Cast. Below are a few photos.


| For reference, here’s a photo of the real thing. |
Sunday, September 9, 2012
A new source for 10mm buildings
Up to this point I have been primarily using building from Jerry’s Hobby Junction for my 10mm wargaming needs. I feel that Jerry’s range of buildings does a great job covering single story structures, but when it comes to two story structures the range comes up a bit short. To resolve this shortage, I decided to give plastic N scale model railroad buildings a try.
As a result of model railroading being a much more popular hobby, there is a very large assortment of buildings available. Unfortunately, most of these are not suitable for the 19th century. After doing some browsing on e-bay, I found several models that would meet my needs. As usual the first thing I did after my first building arrived in the mail was to compare it to my Jerry’s Hobby Junction buildings. As I was hoping they matched up perfectly. Since then I have purchased several more building and I’m very satisfied with them.
The downside to using model railroading buildings is, 1) most of the time, the models need to be assembled, 2) they retail for about twice as much as resin buildings. However, if your patient these buildings commonly come up on e-bay for much less than the retail price.
Looking forward, I can see myself adding more N scale model railroading buildings to my terrain arsenal as I need them.
As a result of model railroading being a much more popular hobby, there is a very large assortment of buildings available. Unfortunately, most of these are not suitable for the 19th century. After doing some browsing on e-bay, I found several models that would meet my needs. As usual the first thing I did after my first building arrived in the mail was to compare it to my Jerry’s Hobby Junction buildings. As I was hoping they matched up perfectly. Since then I have purchased several more building and I’m very satisfied with them.
| Building Comparison Photo: on the left is an N scale plastic model railroad building, and on the right is a resin building from Jerry’s Hobby Junction |
The downside to using model railroading buildings is, 1) most of the time, the models need to be assembled, 2) they retail for about twice as much as resin buildings. However, if your patient these buildings commonly come up on e-bay for much less than the retail price.
| Model Power, Bella's Farm House |
Looking forward, I can see myself adding more N scale model railroading buildings to my terrain arsenal as I need them.
| Model Power, The Sullivan's |
| A.H.M., American Farm House |
| Model Power, Farm House |
Monday, July 2, 2012
10-15mm Cornfields
I have just finished up a week of building some new cornfields for my upcoming series of Antietam games. In prior games, I was using plastic grass door mats to model my cornfields (see the Battle of First Manassas). I thought that the door mat approach was effective, but I was looking to take my Cornfields to the next level.


As you can see I used the Canadian Pine Stem method. To make these I used the basic process outlined on the Northwest Historical Miniature gamer’s page. You can see that here LINK. I also looked into using BUSCH plastic HO cornfields, but I finely decided on using pine stems because they were more cost effective. Like most everything else in this hobby, building these cornfields was very tedious. My first batch consisted of 50 1-1/2 X 1-1/2 bases. Each base has 16 stalks. The good news is I think they came out great and I can also use them with my 15mm figures. The bad news is that I need to do another 75 bases. Time for me to order more materials and get back to work.
-Bryan

As you can see I used the Canadian Pine Stem method. To make these I used the basic process outlined on the Northwest Historical Miniature gamer’s page. You can see that here LINK. I also looked into using BUSCH plastic HO cornfields, but I finely decided on using pine stems because they were more cost effective. Like most everything else in this hobby, building these cornfields was very tedious. My first batch consisted of 50 1-1/2 X 1-1/2 bases. Each base has 16 stalks. The good news is I think they came out great and I can also use them with my 15mm figures. The bad news is that I need to do another 75 bases. Time for me to order more materials and get back to work.
-Bryan
Friday, June 8, 2012
Review: 10mm U.S. Civil War Buildings from Old Glory 25
Hello, today I have a quick review of Old Glory’s 10mm U.S. Civil War buildings. To be honest I’ve been meaning to do this review for some time now, but other hobby related projects have taken priority. Hopefully in the not too distant future I will also have a review of the new line of 10mm building from Buildings in Turmoil. I hope you find this review useful.
-Bryan
Old Glory offers their buildings in two sets. The first set is five pieces and includes three buildings, a church, and one outbuilding. The second set is six pieces and includes two buildings, a barn, two outbuildings, and a well. Each set is priced at $35. Even better if you have the Old Glory Army discount card each set is only $21. That’s around $5 a building or about half of what other 10mm/15mm building are being sold for!
I decided to purchase the set with the Church. Like all my transactions with Old Glory 25 everything went smoothly. My very first impression after removing the buildings from their packaging was “wow these seem large for 10mm scale”. My initial impression was confirmed after I compared them to some of my 10mm figures and buildings. In fact, these buildings match up better with my 15mm building from JR Miniatures. After making these comparisons, I concluded that Old Glory’s buildings seem to be better scaled for use with 15mm figures. Below are a few comparison images I did.
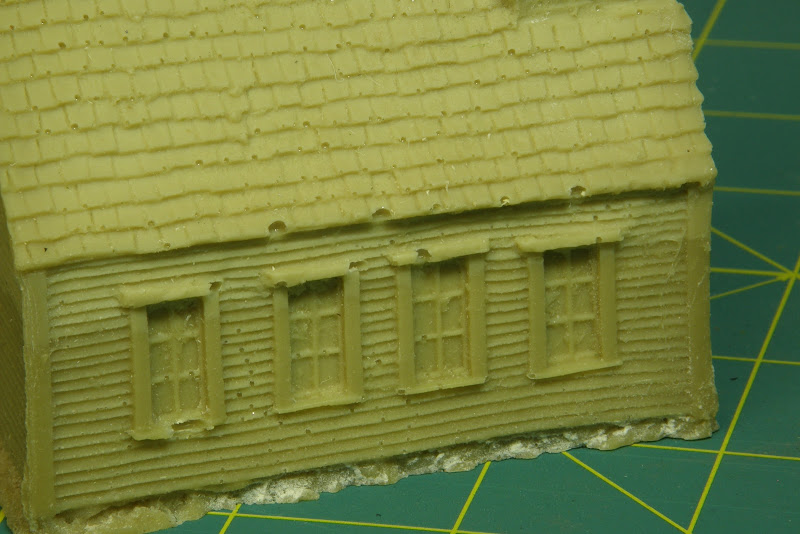
The overall molding quality of the buildings is average. Throughout the models there are many small imperfections in the resin caused by air bubbles. Also, several spots on the buildings chimneys and siding have excess resin that will need to be removed.
What I really like about these buildings is the assortment of structures offered in the two sets. Each set comes with a large barn and outbuildings. I see no reason why these buildings can’t be use for the American War of Independence through the American Civil War.
My final assessment of these buildings is that they are a very good value if you have an Old Glory Army card, but they seem to be better scaled for use with other 15mm building. As a result, these buildings will probably not see any use in my 10mm scale games, but they may come in handy with future 15mm projects. So if you’re a 15mm gamer and you’re looking for some new buildings, I recommend that you check these buildings out.
Product link- Old Glory 25's US Civil War Buildings
I decided to purchase the set with the Church. Like all my transactions with Old Glory 25 everything went smoothly. My very first impression after removing the buildings from their packaging was “wow these seem large for 10mm scale”. My initial impression was confirmed after I compared them to some of my 10mm figures and buildings. In fact, these buildings match up better with my 15mm building from JR Miniatures. After making these comparisons, I concluded that Old Glory’s buildings seem to be better scaled for use with 15mm figures. Below are a few comparison images I did.
| Miniature Comparison: The figures pictured here are 10mm Pendraken and 15mm Musket Miniatures. Note: Old Glory’s 10mm figures are about the same size as Pendraken |
| 15MM Buildings Comparison: The poorly painted buildings on the out sides are 15mm scale from JR Miniatures. As you can see Old Glory’s buildings match up pretty well with them. |
| 10mm Building Comparison: In this image I compare my N scale buildings from Jerry’s Hobby Junction to Old Glory’s buildings. As you can see the buildings don’t match up very well. |
The overall molding quality of the buildings is average. Throughout the models there are many small imperfections in the resin caused by air bubbles. Also, several spots on the buildings chimneys and siding have excess resin that will need to be removed.
What I really like about these buildings is the assortment of structures offered in the two sets. Each set comes with a large barn and outbuildings. I see no reason why these buildings can’t be use for the American War of Independence through the American Civil War.
My final assessment of these buildings is that they are a very good value if you have an Old Glory Army card, but they seem to be better scaled for use with other 15mm building. As a result, these buildings will probably not see any use in my 10mm scale games, but they may come in handy with future 15mm projects. So if you’re a 15mm gamer and you’re looking for some new buildings, I recommend that you check these buildings out.
Links:
Product link- Old Glory 25's US Civil War Buildings
Sunday, February 26, 2012
10mm Roads
I’ve had several people ask me what I was using for roads ever since I started to share my Civil War game photos. I will use this post to answer that question.

Roads are one of those terrain features that can make or break your battlefield, so when I decided to do my American Civil War project in 10mm scale one of the first questions I had to ask myself was “what will I use for roads”. As always, one of the first places I checked was the TMP forum’s to see what other people were using. Unfortunately, the most common answers were felt or sand. I was not satisfied with these answers, so I continued my search. While browsing the blog, “CHARGE! Civil War gaming” by Scott Mingus, I discovered a review that he did on 1” flexible roads from Monday Knight Productions. In this review, Scott included simple step by step instructions on how he enhanced the appearance of his roads. I had seen the unfinished version of these roads before, and I really was not impressed with them but after seeing how Scott was able to greatly enhance the appearance by simply adding a black wash and then flocking the edges, I was convinced. I have not looked back since buying my first set. What I like about these roads are: 1) They are extremely flexible. 2) The straight road section comes in 22” length; these can then be trimmed to any size you desire. 3) The road surface is 1” wide and in my opinion they look great with my 10mm figures. 4) The roads come in a variety of different shapes and sizes. 5) You can find these roads for sale in the dealers’ hall at most HMGS East conventions. The only downside to these roads is you need to store them flat or they will become wrinkled.


For more information on these roads, I recommend that you check out Scott Mingus’s review. I followed the same modeling steps that he lays out, except I used a dark brown wash instead of black. To sum things up, if you’re looking for roads to use with your 10mm armies I recommend that you give Monday Knight Productions a try.
Flexible 1” dirt roads from Monday Knight Productions, By Scott Mingus, Part 1, Part 2
I hope this helps
-Bryan

Roads are one of those terrain features that can make or break your battlefield, so when I decided to do my American Civil War project in 10mm scale one of the first questions I had to ask myself was “what will I use for roads”. As always, one of the first places I checked was the TMP forum’s to see what other people were using. Unfortunately, the most common answers were felt or sand. I was not satisfied with these answers, so I continued my search. While browsing the blog, “CHARGE! Civil War gaming” by Scott Mingus, I discovered a review that he did on 1” flexible roads from Monday Knight Productions. In this review, Scott included simple step by step instructions on how he enhanced the appearance of his roads. I had seen the unfinished version of these roads before, and I really was not impressed with them but after seeing how Scott was able to greatly enhance the appearance by simply adding a black wash and then flocking the edges, I was convinced. I have not looked back since buying my first set. What I like about these roads are: 1) They are extremely flexible. 2) The straight road section comes in 22” length; these can then be trimmed to any size you desire. 3) The road surface is 1” wide and in my opinion they look great with my 10mm figures. 4) The roads come in a variety of different shapes and sizes. 5) You can find these roads for sale in the dealers’ hall at most HMGS East conventions. The only downside to these roads is you need to store them flat or they will become wrinkled.


For more information on these roads, I recommend that you check out Scott Mingus’s review. I followed the same modeling steps that he lays out, except I used a dark brown wash instead of black. To sum things up, if you’re looking for roads to use with your 10mm armies I recommend that you give Monday Knight Productions a try.
Links
Monday Knight ProductionsFlexible 1” dirt roads from Monday Knight Productions, By Scott Mingus, Part 1, Part 2
| Some of my roads after being finished |
| My storage method |
I hope this helps
-Bryan
Monday, January 16, 2012
American Civil War Project (Phase 2)
2012 is here and its time to begin phase two of my 10mm American Civil War Project. Last year I was able to paint just fewer than 400 bases of infantry (1600 figures), 30 artillery bases and various commanders. My main goal for this year is to double the size of my armies. With that in mind my goals for 2012 are:
These goals are somewhat aggressive and a lot depends on when Pendraken starts to releases their new range of figures. If I can meet or come close to meeting these goals, I will feel like I had a productive year. My plan is to post monthly updates on my progress here, so be sure to check back. Now onto what I’m currently working on.
I have spent the past few weeks working on painting mounted and dismounted cavalry. I have found that Perrin’s mounted cavalry are the best offered in 10mm scale and to my disappointment nobody really makes great dismounted cavalry. Below are some photos of my progress so far. I will share more details and photos once I get them based.
Preparations for my first game of the year are also underway. This game will be based on the first days fighting around the Elkhorn Tavern during the Battle of Pea Bridge. For this game I will be using the scenario published in the “Guns at Gettysburg Scenarios 2, Frontier” book by Paul D. Stevenson. The game will be held at Walt’s Hobby shop on January 22nd. Below is an image of the buildings that I’ve been working on for the game.
- Paint 200 bases (800 figures) of Union infantry
- Paint 200 bases (800 Figures) of Confederate infantry
- Paint 30 bases (90 Figures) of Mounted Confederate Cavalry
- Paint 30 bases (120 Figures) of dismounted Confederate Cavalry
- Paint 30 bases (90 Figures) of Mounted Union Cavalry
- Paint 30 bases (120 Figures) of dismounted Union Cavalry
- Paint 10 bases (40 figures) of Union Artillery
- Build/Paint 6’ of entrenchments
- Game 15 battles from 1862.
These goals are somewhat aggressive and a lot depends on when Pendraken starts to releases their new range of figures. If I can meet or come close to meeting these goals, I will feel like I had a productive year. My plan is to post monthly updates on my progress here, so be sure to check back. Now onto what I’m currently working on.
I have spent the past few weeks working on painting mounted and dismounted cavalry. I have found that Perrin’s mounted cavalry are the best offered in 10mm scale and to my disappointment nobody really makes great dismounted cavalry. Below are some photos of my progress so far. I will share more details and photos once I get them based.
| Union Cavalry |
| Union Cavalry |
| Union Cavalry |
| Confederate Cavalry |
| Confederate Cavalry |
Preparations for my first game of the year are also underway. This game will be based on the first days fighting around the Elkhorn Tavern during the Battle of Pea Bridge. For this game I will be using the scenario published in the “Guns at Gettysburg Scenarios 2, Frontier” book by Paul D. Stevenson. The game will be held at Walt’s Hobby shop on January 22nd. Below is an image of the buildings that I’ve been working on for the game.
| These building will serve as the Elkhorn Tavern and Clemon’s Farmhouse for my upcoming Battle of Pea Ridge game |
Thursday, September 8, 2011
Battle of Bull Run Preview
Over the weekend I did a dry run of the Battle of Bull Run game that I’m running this weekend. Below are a couple of images that I took.
It took me most of the day to get this table setup. I use almost 25 feet of rail fence and I had just enough trees to cover the table. Overall I’m pretty happy with how the table looks. I can’t wait to fight the battle this weekend. More information on this game can be found here: http://saltcitywargamers.wordpress.com/2011/08/11/gaming-event-bull-run-1861/
Keywords: Battle of 1st Bull Run, Battle of 1st Manassas, American Civil War 10mm, ACW 10mm
| Henry House Hill looking North-West. The Henry House is the white building near the center. |
| Looking South-West |
It took me most of the day to get this table setup. I use almost 25 feet of rail fence and I had just enough trees to cover the table. Overall I’m pretty happy with how the table looks. I can’t wait to fight the battle this weekend. More information on this game can be found here: http://saltcitywargamers.wordpress.com/2011/08/11/gaming-event-bull-run-1861/
Keywords: Battle of 1st Bull Run, Battle of 1st Manassas, American Civil War 10mm, ACW 10mm
Wednesday, August 10, 2011
10mm Terrain (Part 1)
With the painting side of my Civil War (phase 1) project nearly complete, over the past week I’ve begun to shift my focus to building terrain. Below is a quick review of my progress so far.
My rivers are from JR Miniatures. The main reason I decided to use rivers from JR miniatures is because of the variety of pieces and scales they offer. My plan is to use a combination of 6mm and 15mm scales to model different size rivers and streams. The downside to these rivers is I can’t stand how they are painted. To remedy this I decided to repaint them to my liking. Below are some before and after images. Tell me what you think.
I will need a lot of trees to properly model a 19th century American battlefield. For that reason I decided to use pre built trees from Woodland Scenics. I feel that pre-built trees are more durable than the ones that you build yourself and besides I hate building trees. Unfortunately, pre-built doesn’t mean war game ready. I still spend quite a bit of time cleaning them up (removing excess foliage and gluing down loose foliage). The trees that I use will range in size from 2” to 5”.
Rail fence is a vital part of the Civil War battlefield. For my refight of Bull Run I will need around 25 feet of fence. That’s a lot of fence! I went with Battlefield Terrain Concepts 15mm snake rail fence kits to meet my fencing needs. I also plan to mix in some rail fence from Musket Miniatures.
Key Words: 10mm terrain, Civil War 10mm, JR Miniatures, 6mm Rivers, Woodland Scenics, Battlefield Terrain Concepts, 10mm Snake Rail Fence
Rivers:
My rivers are from JR Miniatures. The main reason I decided to use rivers from JR miniatures is because of the variety of pieces and scales they offer. My plan is to use a combination of 6mm and 15mm scales to model different size rivers and streams. The downside to these rivers is I can’t stand how they are painted. To remedy this I decided to repaint them to my liking. Below are some before and after images. Tell me what you think.
| Before |
| After |
| One down and a lot to go |
Trees:
I will need a lot of trees to properly model a 19th century American battlefield. For that reason I decided to use pre built trees from Woodland Scenics. I feel that pre-built trees are more durable than the ones that you build yourself and besides I hate building trees. Unfortunately, pre-built doesn’t mean war game ready. I still spend quite a bit of time cleaning them up (removing excess foliage and gluing down loose foliage). The trees that I use will range in size from 2” to 5”.
| The first 70 trees |
Rail Fence
Rail fence is a vital part of the Civil War battlefield. For my refight of Bull Run I will need around 25 feet of fence. That’s a lot of fence! I went with Battlefield Terrain Concepts 15mm snake rail fence kits to meet my fencing needs. I also plan to mix in some rail fence from Musket Miniatures.
| Part of the first batch of 15’ |
Key Words: 10mm terrain, Civil War 10mm, JR Miniatures, 6mm Rivers, Woodland Scenics, Battlefield Terrain Concepts, 10mm Snake Rail Fence
Subscribe to:
Posts (Atom)